Classic Hershey’s Cocoa Fudge Recipe: A Nostalgic, Chocolaty Delight That Never Goes Out of Style
If you’re craving a rich, melt-in-your-mouth chocolate treat that takes you back to your childhood, Classic Hershey’s Cocoa Fudge is your sweet solution. This old-fashioned fudge is the kind of dessert that evokes memories of holidays at grandma’s, bake sales, and festive gatherings. Made from simple pantry ingredients, this decadent, deeply chocolaty fudge has stood the test of time — and for good reason. With a luscious texture and bold cocoa flavor, it’s the perfect gift, party treat, or indulgent snack when only the real deal will do.
Unlike modern microwave versions, this traditional fudge recipe delivers an authentic, homemade taste and texture. Yes, it takes a little patience, but the reward is well worth it. Let’s dive into how to make this irresistible, timeless dessert.
Ingredients & Their Purpose
Each ingredient in this recipe plays a vital role in delivering the perfect fudge texture and flavor:
¾ cup Hershey’s Unsweetened Cocoa – This is the star of the show. Hershey’s cocoa gives the fudge its signature deep, robust chocolate flavor that’s impossible to resist.
3 cups Sugar – The sweet backbone of the fudge, sugar also helps in forming the smooth, creamy consistency once it crystallizes correctly.
½ teaspoon Salt – A pinch of salt balances the sweetness and enhances the cocoa flavor, creating a more complex and satisfying taste.
1½ cups Milk – Milk is the liquid base that helps dissolve the dry ingredients and forms the syrup that becomes the fudge.
¼ cup Unsalted Butter (cut into pieces) – Butter adds richness and helps in creating a smooth, velvety texture.
1 teaspoon Pure Vanilla Extract – Vanilla rounds out the flavor, adding warmth and depth to the chocolate.
½ cup Chopped Walnuts or Pecans (optional) – Nuts provide a crunchy contrast to the soft fudge and add a delightful nutty flavor.
Step-by-Step Instructions
1. Prep Your Pan
Line an 8-inch square baking dish with foil, leaving extra on the sides to lift the fudge out easily. Lightly butter the foil to prevent sticking.
2. Combine and Heat the Base
In a heavy-bottomed saucepan, combine the cocoa, sugar, salt, and milk. Stir constantly over medium heat until the mixture reaches a gentle boil. This takes about 5 minutes.
Pro Tip: Stir slowly but consistently to prevent scorching, especially around the edges.
3. Boil Without Stirring
Once the mixture starts to boil, stop stirring. Let it continue to cook until it reaches 234°F on a candy thermometer or passes the soft-ball test (drop a bit into cold water — it should form a soft, pliable ball).
4. Cool Without Disturbing
Remove the pan from heat and place it into a sink with 2 inches of cold water. Add the butter and vanilla on top, but do not stir. Let it cool naturally until it reaches room temperature (about 30–40 minutes).
Why This Matters: Allowing the fudge to cool undisturbed ensures that sugar crystals form properly, giving the fudge its smooth, creamy consistency.
5. Beat the Fudge
Remove the pan from the water. Using a sturdy wooden spoon, stir vigorously until the mixture loses its glossy sheen and becomes thick and creamy. This can take several minutes and some elbow grease — don’t give up!
Pro Tip: Beating is critical. It changes the texture from gritty to silky. Watch closely — as soon as it starts to thicken, move quickly to the next step.
6. Add Nuts and Spread
If using, fold in chopped nuts. Immediately pour the mixture into your prepared dish and smooth it out evenly.
7. Let It Set
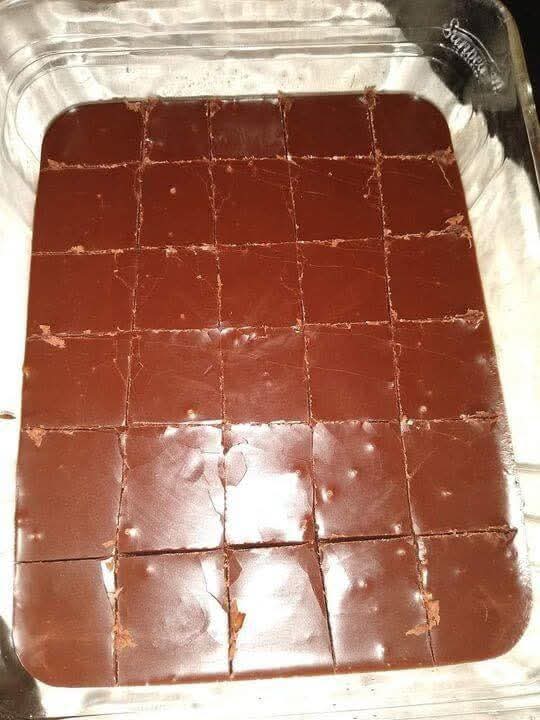
Allow the fudge to set at room temperature for at least 1 hour. Once firm, lift it out of the pan using the foil and cut into neat squares.
Why Everyone Loves This Recipe
This homemade fudge has a deeply nostalgic flavor that’s hard to find in store-bought versions. It’s not just chocolate — it’s real cocoa, expertly prepared into a silky, dense treat. Whether you’re making this for a holiday platter, a bake sale, or a cozy weekend treat, it’s guaranteed to be a hit.
Pure Ingredients – No corn syrup or preservatives, just real cocoa, sugar, and butter.
Customizable – Add nuts, swirl in peanut butter, or drizzle with melted white chocolate.
Gift-Worthy – Wrap in wax paper or store in candy tins for beautiful edible gifts.
Serving Suggestions
This fudge is so good it stands on its own, but here are some fun ways to serve it:
With a glass of cold milk – the ultimate classic pairing.
On a dessert board – mix with cookies, truffles, and fresh berries.
As a sundae topping – chop and sprinkle over ice cream for a decadent twist.
Alongside coffee or espresso – a rich finish to a dinner party.
Final Thoughts: A Fudge Recipe Worth Repeating
Classic Hershey’s Cocoa Fudge is more than a dessert — it’s a return to timeless, homey traditions. With just a few basic ingredients and a bit of care, you’ll create a batch of decadent, chocolatey perfection that rivals any candy shop treat.
This is the kind of recipe that earns a permanent spot in your recipe box — not just because it tastes incredible, but because it feels like home. Whether you’re a seasoned candy maker or a beginner in the kitchen, this fudge delivers.
Simple. Classic. Irresistible. Make it once, and you’ll understand why it’s a chocolate-lover’s must-have.