Introduction
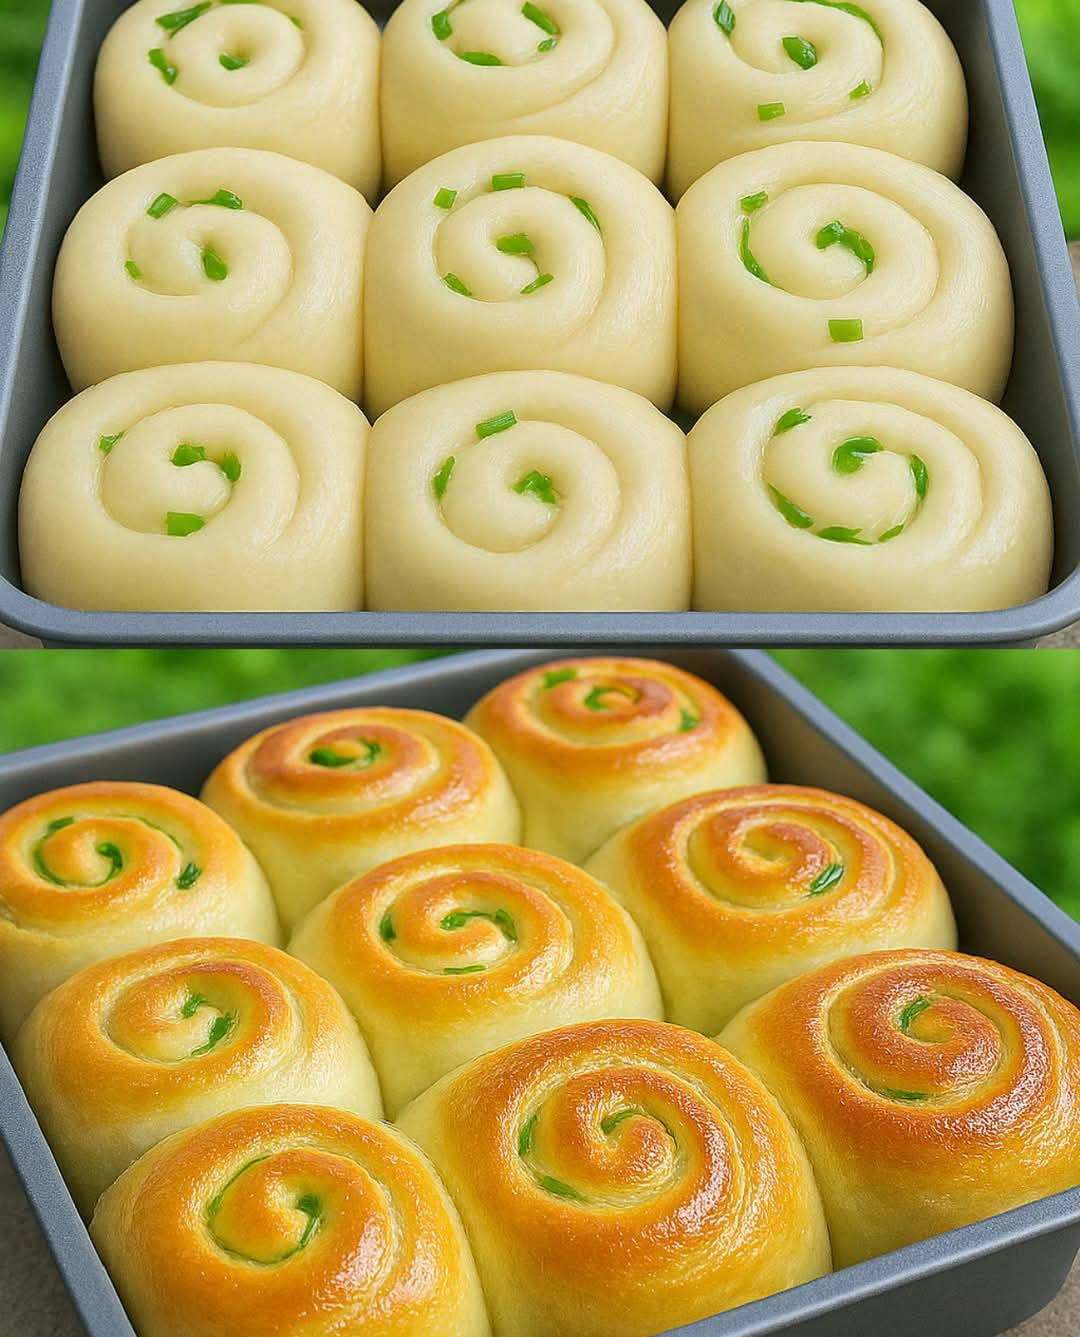
There’s something truly comforting about the aroma of freshly baked bread filling the kitchen—especially when it’s a batch of soft, pillowy milk buns. These buns are a staple in many households, loved for their delicate texture and subtle sweetness. Whether served warm with a pat of butter, used for sandwiches, or enjoyed on their own, they’re a versatile treat that’s both simple and satisfying.
Making homemade milk buns may seem intimidating, but with the right ingredients and a little patience, anyone can achieve bakery-quality results. The secret lies in the perfect balance of warm milk, yeast, and butter, which work together to create a dough that’s tender and fluffy. Follow this recipe closely, and soon you’ll have a tray of golden-brown buns that are as delightful to look at as they are to eat.
Ingredients:
1 cup of warm milk 🥛
2 tablespoons of sugar 🍬
2 1/4 teaspoons of active dry yeast 🌾
6 cups of all-purpose flour 🌾
1/2 cup of unsalted butter, melted 🧈
1 1/2 teaspoons of salt 🧂
1 egg, beaten 🥚
Directions:
In a mixing bowl, combine warm milk, sugar, and yeast. Let it sit for 5-10 minutes until frothy.
Add in the flour, melted butter, and salt. Mix until a dough forms.
Knead the dough on a floured surface for about 5-7 minutes until smooth and elastic.
Place the dough in a greased bowl, cover with a damp towel, and let it rise for about 1 hour or until doubled in size.
Punch down the dough and divide it into equal parts. Shape each part into a bun and place on a baking sheet lined with parchment paper.
Cover the buns with a damp towel and let them rise for another 30 minutes.
Preheat the oven to 375°F (190°C).
Brush the buns with beaten egg and bake for 15-20 minutes or until golden brown.
Allow the buns to cool slightly before serving.
Variations
For a sweeter twist, try adding a tablespoon of honey or maple syrup to the dough. You can also mix in raisins, dried cranberries, or chocolate chips for a fruity or decadent touch. If you prefer a savory version, incorporate grated cheese, garlic powder, or herbs like rosemary or thyme into the dough before baking.
For a healthier alternative, substitute half of the all-purpose flour with whole wheat flour or oat flour. This adds fiber and a nuttier flavor while keeping the buns soft. Another option is to use plant-based milk and vegan butter for a dairy-free version that’s just as fluffy and delicious.
If you’re feeling adventurous, shape the dough into knots or rolls for a fun presentation. You can also fill the buns with sweet fillings like cinnamon sugar, Nutella, or fruit jam before baking. For a savory filling, try pesto, cheese, or even minced meat for a heartier treat.
Tips
To ensure your buns rise perfectly, always check the expiration date on your yeast. Fresh yeast is key for a light and airy texture. If your kitchen is cold, place the dough in a slightly warmed oven (turned off) to help it rise faster. A damp towel over the dough prevents it from drying out during proofing.
When kneading the dough, avoid adding too much extra flour, as this can make the buns dense. The dough should be slightly sticky but manageable. If it’s too wet, add flour a tablespoon at a time. For a glossy finish, brush the buns with an egg wash mixed with a splash of milk or cream before baking.
For even baking, space the buns about 2 inches apart on the baking sheet. Rotate the tray halfway through baking if your oven has hot spots. If the tops brown too quickly, cover them loosely with aluminum foil. Let the buns cool for at least 10 minutes before serving to allow the texture to set.
How to Store
Freshly baked milk buns are best enjoyed the same day, but they can be stored at room temperature in an airtight container for up to 2 days. To revive them, warm the buns in the oven at 300°F (150°C) for 5 minutes or microwave them for 10-15 seconds. Avoid refrigerating, as this can dry them out.
For longer storage, freeze the buns in a freezer-safe bag or container for up to 3 months. Separate layers with parchment paper to prevent sticking. Thaw at room temperature or reheat directly from frozen in a 350°F (175°C) oven for 8-10 minutes. Freezing preserves the soft texture better than refrigeration.
If you plan to make the dough ahead, let it rise once, then punch it down and refrigerate overnight. The next day, shape the buns and let them rise at room temperature before baking. This slow fermentation enhances the flavor and makes the buns even fluffier.
Conclusion
These soft and fluffy milk buns are a versatile treat that can be customized to suit any taste, whether sweet or savory. With simple ingredients and a little patience, you can create bakery-quality buns at home. The key lies in proper proofing, kneading, and baking techniques to achieve that perfect light texture.
Whether served warm with butter, used for sandwiches, or enjoyed as a snack, these buns are sure to delight. Experiment with different variations and toppings to make them your own. Happy baking, and enjoy the delicious results of your efforts!