Homemade Chocolate Sticks
Deprecated: preg_split(): Passing null to parameter #3 ($limit) of type int is deprecated in /home/seariivx/carwom.com/wp-content/themes/jannah/framework/functions/post-functions.php on line 863
These homemade chocolate sticks are a delightful treat for any occasion! Easy to make, customizable, and perfect for gifting, these chocolatey goodies are sure to impress. With a rich dark chocolate base and a variety of toppings, you can create endless flavor combinations to suit your taste. Let’s get started!
Prep Time
15 minutes
Chill Time
30 minutes
Total Time
45 minutes
Servings
8–10 chocolate sticks
Ingredients
For the Chocolate Sticks:
1 cup premium dark chocolate (70% cocoa solids or higher), chopped
½ cup white chocolate chips
¼ cup chopped nuts (almonds, hazelnuts, etc.)
¼ cup dried fruits (cranberries, apricots, etc.), finely chopped
1 teaspoon pure vanilla extract
A pinch of sea salt
For the Toppings:
Shredded coconut (as needed)
Crushed candy canes (as needed)
Rainbow sprinkles (as needed)
Crushed pistachios (as needed)
Instructions
Step 1: Melt the Dark Chocolate
Using a Double Boiler: Place the chopped dark chocolate in a heatproof bowl over a pot of simmering water (ensure the bowl doesn’t touch the water). Stir frequently until the chocolate is completely melted and smooth.
Or Using a Microwave: Heat the dark chocolate in a microwave-safe bowl in 20–30 second intervals, stirring between each interval, until fully melted.
Once melted, stir in the vanilla extract and a pinch of sea salt. Mix well to combine.
Step 2: Create the Chocolate Base
Line a baking sheet with parchment paper or a silicone mat.
Pour the melted dark chocolate onto the prepared baking sheet and spread it evenly into a thin rectangle (about ¼ inch thick). Use an offset spatula or the back of a spoon to smooth the surface.
Step 3: Add Mix-Ins
Sprinkle the chopped nuts and dried fruits evenly over the melted dark chocolate. Gently press them into the chocolate with your fingers or the back of a spoon to ensure they stick.
Step 4: Drizzle with White Chocolate
Melt the white chocolate chips using the same method as the dark chocolate (double boiler or microwave).
Transfer the melted white chocolate to a small resealable plastic bag. Snip off a tiny corner of the bag and drizzle the white chocolate over the dark chocolate base in zigzag patterns.
Step 5: Add Toppings
While the chocolate is still wet, sprinkle your choice of toppings (shredded coconut, crushed candy canes, rainbow sprinkles, crushed pistachios) evenly over the surface. Press lightly to help them adhere.
Step 6: Chill the Chocolate
Place the baking sheet in the refrigerator and chill for 30 minutes , or until the chocolate is completely set and firm.
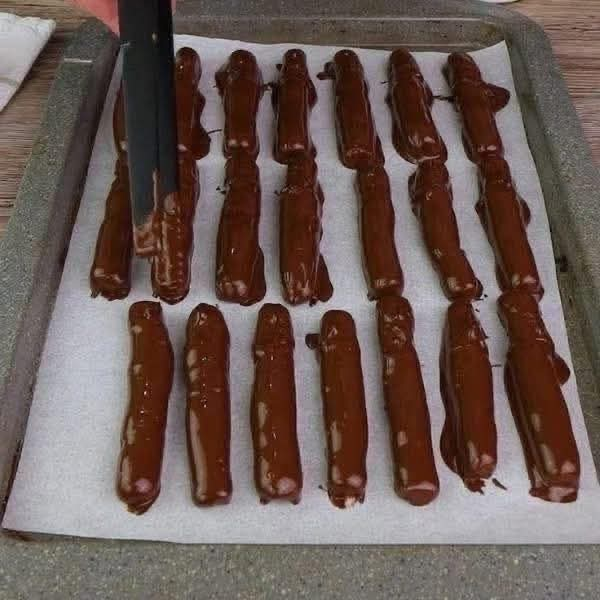
Step 7: Cut into Sticks
Once the chocolate is set, remove it from the refrigerator and carefully lift it off the parchment paper.
Use a sharp knife or pizza cutter to slice the chocolate into even sticks (about 1-inch wide).
Step 8: Store and Serve
Store the chocolate sticks in an airtight container at room temperature for up to 1 week or in the refrigerator for up to 2 weeks .
Serve as a sweet snack, dessert, or package them in cellophane bags tied with ribbon for a thoughtful homemade gift.
Pro Tips
Customize Your Toppings: Experiment with different toppings like crushed pretzels, mini marshmallows, or edible glitter for a fun twist.
Tempering Chocolate (Optional): For a glossy finish and better texture, temper the chocolate before spreading it.
Break Instead of Sticks: If cutting into sticks feels tricky, simply break the chocolate into irregular shards for a rustic look.
Nutrition Facts (Per Stick, based on 10 servings)
Calories: 150
Protein: 2g
Carbohydrates: 18g
Fat: 9g
Fiber: 2g
Sugar: 12g
Note: Nutrition values are approximate and may vary based on specific ingredients used.
Deprecated: preg_split(): Passing null to parameter #3 ($limit) of type int is deprecated in /home/seariivx/carwom.com/wp-content/themes/jannah/framework/functions/post-functions.php on line 863